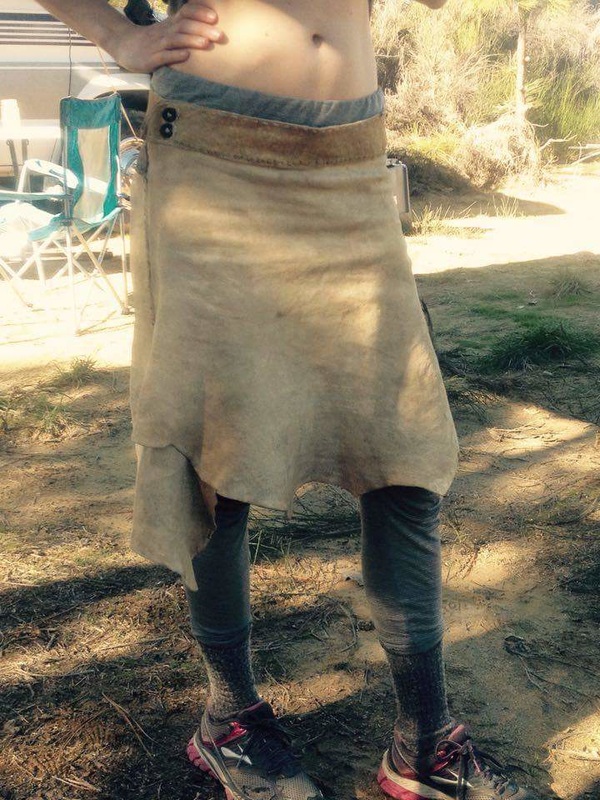
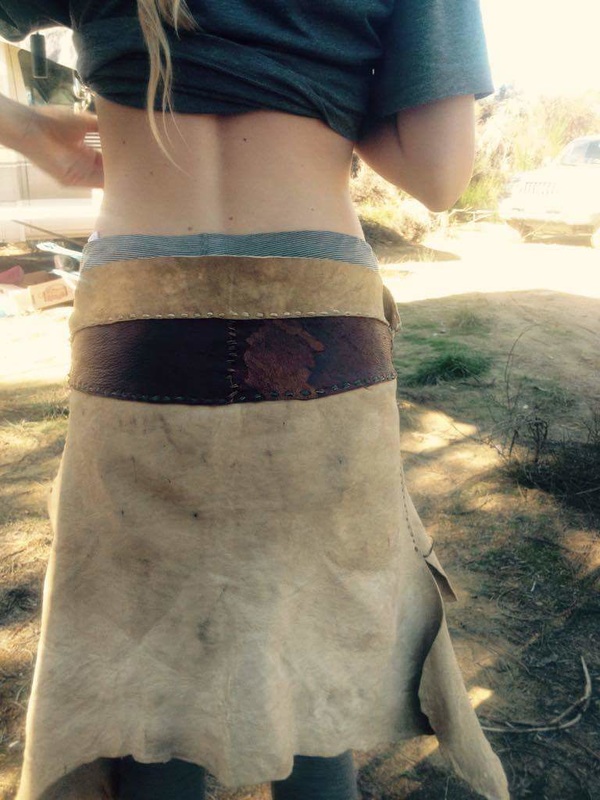
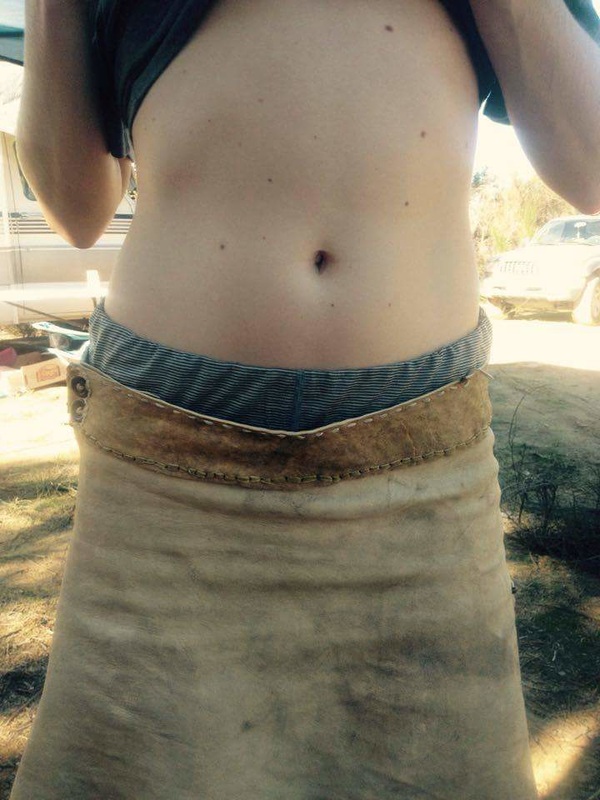
 I helped Kelly put together this skirt at a class at Saskatoon Circle, 2015. A great design, with a barktanned yoke in the back and buckskin dyed blue with indigo for the sewing thong. When she had it all put together though, the waistband wasn't really functional. It was lower on her hips than she wanted and was sitting away from her body not doing much to hold the skirt up. I am sure others have experienced similar problems, so here are my two cents on dealing with this issue. First off, one of the most important things is to make your skirt on the small side, rather than just right! It counter intuitive, because with cloth sewing you are better off making it too big as it is easy to take it in a bit. With buckskin though, it is going to stretch on you. It being just right to start with, rather than too small, is definitely part of what is going on with the skirt. I think it can be fixed with some waistline altering in this case, though, which is great. Another important factor with waistlines is that, while people tend to think of them as straight across from hip to hip, they really aren't. Everyone's shape is different, of course, but most women's butts stick out more than their bellies. This means that to fit nicely and give the appearance of straight across, the waist of the skirt should dip down a little in the front and rise up a little in the back. See the little wrinkle under the waistband in the picture at the right? My guess is that this is from the skirt bunching here to make for a dip in the waist. She made a scoop at the bottom of the skirt, but not enough of one at the top of the skirt. Another issue is that if the skirt doesn't have a way to open up enough to let the skirt slide easily over the hips when pulling it on, it will stretch out until it ends up their width. This means it is going to be wider and sit lower than you want it to. She made the waistband able to open up with the buttons at the side, but it could use a bigger opening that goes further down the side seam. Ideally, it would open from the narrowest part of the skirt (wherever you want the waist band to sit) to the widest part of the hips. For her, this would mean opening another couple of inches down, not just at the waist band. She has already taken in the waist a bit by moving the buttons further in and taking little darts out of the side of the waistband. To really solve the issue and make it the skirt she wants though, I recommend pulling the waist band off and scooping the waist a bit more. She asked also about scooping the back, but this would only exacerbate the problem! Butts up, waists down! Take a look at a pair of jeans when they are off of your body and you will see this rise in the back, scoop in the front. Just scooping the front is usually enough for skirts though! Another huge factor with waistbands is making them hug the hips by making them more of a cone, not a cylinder. To do this, you either need to pucker them a bit at the top with a tight runing stitch or make them in several pieces so you can sew the hip hug into them. by making a diagonal junction in the waist pieces. (see illustration below) I like to do both, and that is what I would recommend here. 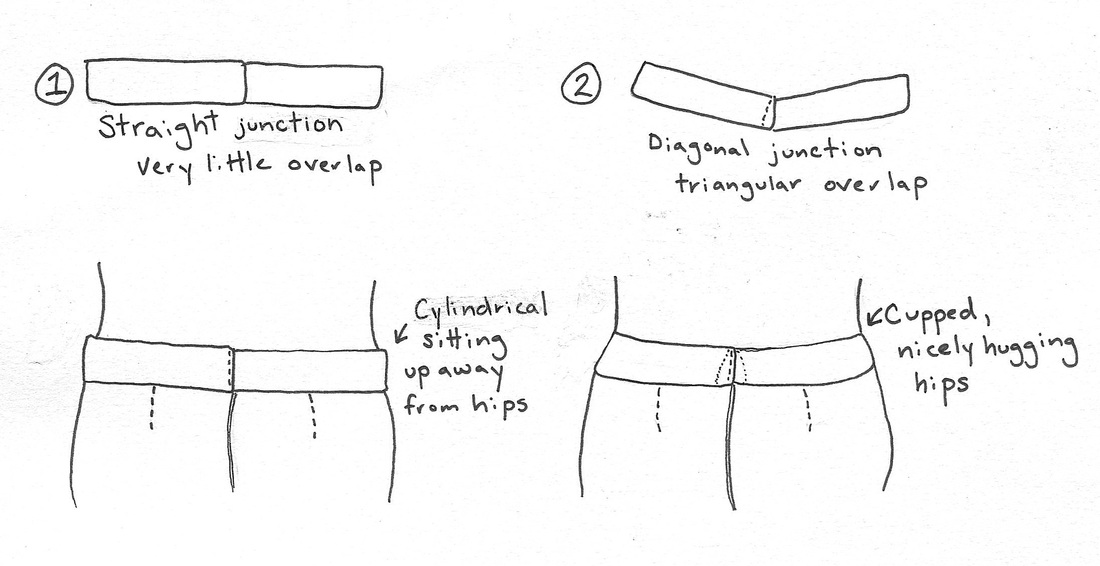 So Kelly, I would pull the waistband off of the skirt. I would pull out a few inches of the side seam and put buttons there so it can open up wider to pull on. I would add a little more scoop to the waist of the skirt pieces (say an inch or two lower in the front, curving up to the current sides). I would make the waistband a little smaller, plus cut it in the middle of the back to put in angles there, plus deeper angles at the sides. I would then sew it back on, in pieces and compensate for the fact that it is now smaller than the skirt's waist by making little subtle puckers in the skirt as you sew it up. This mean each stitch will take in a little more length of the skirt piece than it does of the waist piece. These puckers will be visible at first but will dissapear as it wears in, so long as they are small, regular, subtle puckers. Then I would play with the angles where all of your waist band pieces come together, adjusting the overlap until they hug the hips just right. Finally, i would sew up the top of the waistband with the running stitch, and pull it noice and tight so that it puckers a bit, thus hugging the hips even more.
Hope this helps and please report back on how it all works out and ask more questions as they come up. Big thanks to Kelly for being willing to be my guinea pig with my first tailoring blog post! Keep the questions coming, everyone!
0 Comments
Your comment will be posted after it is approved.
Leave a Reply. |
Archives
April 2016
Categories |

 RSS Feed

|
Buckskin Revolution is dedicated to positive change, social justice, and equal access to learning and other resources for all people regardless of race, ethnicity, gender or sexual orientation. Recognizing there are socio-economic factors that can result in less access and other harms, we work toward equity and reparations by offering scholarships and discounted rates for indigenous, black and transgender people. Contact Woniya to apply or for further details.
|
Proudly powered by Weebly